Mean Giant Honeying
Wiki Editors Needed! Click Here to Register Now!
From Fiesta Wiki
Kill all the monsters and stop the Giant Honeying in the designated amount of time.
| Level Requirement: | 40 - 50 |
| Number of Participants: | 1 - 10 |
| Time Limit: | 30 Minutes |
| Lives: | 3 |
| Frequency: | Every Two Hours |
Contents |
Strategy
Much like King Slime's Counterattack, the group will need to kill every mob on each level, before they proceed to the next level.
Unlike King Slime KQ, the group will need to move quickly, and efficiently through the levels, in order to beat the much shorter time limit.
- Assign a Tank
Designate a tank with good defense to pull mobs for the group to AoE. And the group should move through the levels together. Make sure you kill off every mushrooms / Kebings / Boogies at the beginning, often time is wasted because one mob wasn't killed, and someone has to go back and kill it.
- Top of the Hill
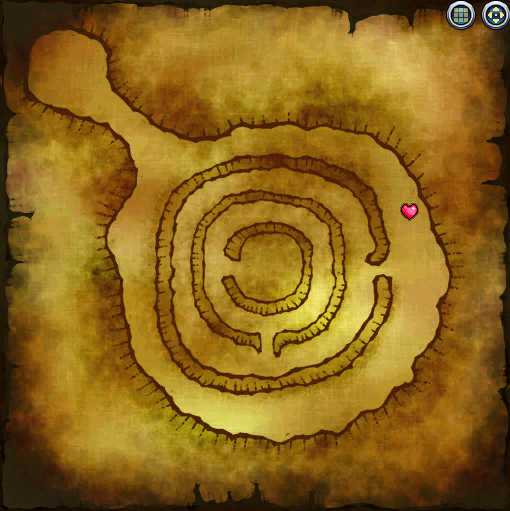
When you get to the top of the hill, you will see the Giant Honeying and its two groups of Shadow Honeyings.
First kill the Shadow Honeyings (one group at a time), then proceed to kill Giant Honeying after the Shadows have been killed. This is because Shadows actually deals a lot of damage, and Giant Honeying will continuously spawn more Shadows, if the group doesn't kill the Shadows first, you'll have a lot of mobs running around killing players off. So it is best not to rush into the Giant Honeying (even though I know it's very tempting!)
- Killing Giant Honeying
As you kill Giant Honeying, he will begin to spawn more Shadow Honeyings in groups of 3, 5, 7 etc. The group may choose to kill the Shadows while the spawn numbers are small, but when the numbers of Shadows increase, the tank should move away from the spawns with the Giant Honeying, and leave the Shadows behind for kill later. This will reduce the damage dealt on the tank, reducing the risk of death.
Other Tips:
- Make sure everyone has a set of all scrolls, particularly T3, but T1 will work if you try.
- Make sure you have at least one cleric that can Endure, and have him/her Endure everyone.
- Make sure you have at least one Fighter Tank, and either a secondary tank (in case the first falls), or a Clank (Cleric Tank). Note: A Mage with +9 armor with T3 scrolls can also tank this fairly easy.
- Only have the Main Tank lure huge groups of mobs. Have everyone work together to pick the mob to shreds.
- Make sure all Clerics know to heal the main tank, and use Invincible to its max (have one cleric use Invincible, then when it runs out do another).
- Ignore the time. Just work through best you can and keep everyone alive. Pick off mobs the tanker brings and don't let any go unnoticed.
- It doesn't really matter how many DDs or extra Clerics you have, just as long as you have the Endure Cleric, Main Tank, and a Secondary Tank. Everyone else either becomes healable cannon fodder or DDs. Yes, even if the rest of the people are all clerics.
- Don't give up. There have been instances where this KQ has been completed by only 8 people.
Fiend Tips:
-- Watch out for the Procks. They can easily all attack the tank and take him out. It's best to either separate the damage, or Invincible the tank one after another (each Cleric invincing when the buff runs out).
Group Structures
Plan A - 7-8 clerics, a few Fighters, little or no DDs (Archers/Mages) First of all, Endure everyone. This will mainly be the main tank pulling huge mobs. The other Fighters either turn into DDs or use Mock to spread out the damage. Clerics heal AND fight. DDs fight. Everyone must work together.
Plan B - 7-8 Fighters, a few Clerics, little or no DDs (Archers/Mages)
Endure all. Pick the best tank out of the Fighters. Put both Clerics in his party, or one in each party (but make sure both know to heal him when he pulls). All the other Fighters become DDs or Tank-breakers (breaking up the mob the tank brings). Clerics ONLY heal, fight if they can. Fighters all fight. DDs fight if there are any. Everyone must work together.
Plan C - 1-2 Fighters, 1-2 Clerics, Tons of DDs (Archers/Mages)
Endure all, again. The best tank pulls mobs, but this time the DDs do massive AoE. Clerics need to solely heal the fighter. The fighter needs to spam Mock and Kick and continue varying between which monster hes attacking. If done right, the DDs wont get hit at all, and clerics can purely focus on the Fighter tank.
All others:
Find one tank. They always pull the mobs NO MATTER WHAT. Everyone else fights, even the clerics. Clerics can fight and heal at the same time.
Rewards
Guaranteed Reward:
- 90000 EXP
- Giant Honeying's Reward
Possible rewards when opening "Giant Honeying's Reward":
- Scroll Material:
- Potion Ingredients:
- Stone Material:
- Potions:
- -
- Scrolls:
- -
- Blue Weapons (Level 50):
- Gaze of Cainance
- Wing of Canary
- Necklaces:
- Crystal Gold Necklace
During KQ:
- Cards:
- S-Card - "Honey Collector"
- A-Card - "Hungry Wolf"
- C-Card - "Honeying"
- C-Card - "Prock"
- C-Card - "Tomb Fox"
- C-Card - "Ratman's Retaliation"
See Also
| Kingdom Quests | edit |
|---|---|
|
Level Dependent: King Slime's Counterattack, Mara Pirates' Rage, Gold Hill Adventure, Millenium Robo Plot, Mean Giant Honeying, Lost Mini Dragon, Spider's Assault, King Kong Phino's Mess, Evil Spirit Gordon Master, Henneath Rebellion War, Fortress of Shadows All Levels: Spring Battlefield, Hidden Mine | |

