Job Change Quests
Wiki Editors Needed! Click Here to Register Now!
From Fiesta Wiki
(→The Easy Part) |
(→Someone's summary?) |
||
| Line 225: | Line 225: | ||
===Someone's summary?=== | ===Someone's summary?=== | ||
| - | THIS QUEST IS HARD! Stock up on stones before the quest. There are very few breaks to do this. I don't exactly remember what is in it but I know that you will have to have luck for a gambler part, then kill the gambler when you win. You then get transported to roumen where waves of some kind of | + | THIS QUEST IS HARD! Stock up on stones before the quest. There are very few breaks to do this. I don't exactly remember what is in it but I know that you will have to have luck for a gambler part, then kill the gambler when you win. You then get transported to roumen where waves of some kind of zombie raid the empty town 3 times, and you have to kill all of them. You then get teleported to a field (in the past of Isya) Where Roumen(a fighter NPC) and Eldrine (an archer NPC) ae defending a new settlement in Isya. YOU CAN'T LET EITHER ROUMEN OR ELDRINE DIE(Note: Clerics You can't heal either of them so don't think you have your work cut out for you) BY KILLING ALL THE CREATURES! After that you will return to Grand Master Sean and he will tell you that you succeded where he failed(or something like that) and that you earned a great reward. Finally Return to your respective skill NPC in Eldrine(the town). LVL 60 Job Change Quest COMPLETED! :-) |
Personal observation from falken(teva)6x warrior: roumenus can handle any mob thrown at him. Smart idea for any class is to keeep the mob off of the archer. After that mob is done then get the mob off the fighter. This worked for me but im a fighter. Your probly thinkin that it worked for me because of that but I have a cleric friend who did the same thing so it works. | Personal observation from falken(teva)6x warrior: roumenus can handle any mob thrown at him. Smart idea for any class is to keeep the mob off of the archer. After that mob is done then get the mob off the fighter. This worked for me but im a fighter. Your probly thinkin that it worked for me because of that but I have a cleric friend who did the same thing so it works. | ||
Revision as of 08:55, 25 May 2008
Contents |
Introduction
Throughout your gaming experience in Fiesta, you will encounter various times where you will be presented with an opportunity to advance your "job," or class. As of now, there are two opportunities to do so: Once at level 20 and once at level 60.
Level 20 Job Change
So, level 20 now, eh? Happy that you can do your job change quest? You think this is going to be easy? THINK AGAIN! The difficulty level is actually different depending on your class.’ being a mage, I have failed the quest three times before succeeding; but as a cleric, I succeeded on my first try without much difficulty at all; if you want to save your time and money to get through this in the first go, then read this guide. Some might have found it easy, but it was fairly difficult for me because I had no idea what I was supposed to be expecting. It would be better if you start the quest knowing what to expect.
Before You Begin
Make sure you have the following:
- Lots of HP/SP stones and potions. You will need it throughout the quest (mainly for the last part - keep in mind you CANNOT rest in your mini house in the Dungeon of Shadows).
- Scrolls (I have used vitality, power and defense scroll). You will need this for the last part.
- Elderine/Roumen scrolls if you don’t want to walk all the time.
Oh and also, if you have a computer that likes to stuff up or lag every now and then, I suggest you to restart your game/computer/whatever just as a safety measure. I had failed my third attempt because of lag and that wasted a whole lot of my HP/SP pots and scrolls. Not sure if that would help, but it doesn’t hurt to do it anyway, right?
The Easy Part
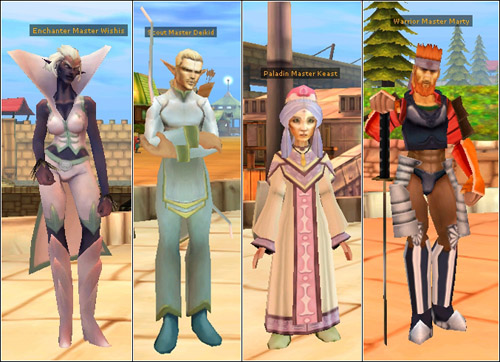
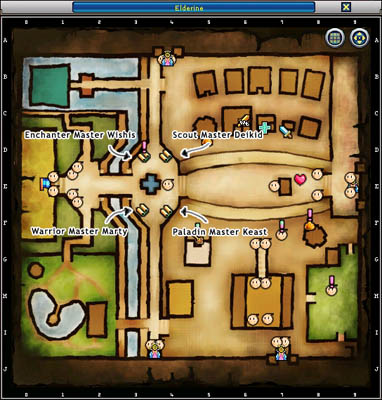
Each class will have to meet their own NPC and complete different missions before going to the Dungeon of Shadows.
- Mages have to seek Enchanter Master Wishis.
- Archers have to seek Scout Master Deikid.
- Clerics have to seek Paladin Master Keast.
- Fighters have to seek Warrior Master Marty.
Mages
After you have spoken to Enchanter Master Wishis, she will tell you to fight 10 boars. Piece of cake. I assume you know where boars are by now (if you don’t… they can be found at the center of Forest of Mist near Ratmen). When you’re done, return to Wishis and she’ll tell you to go see Grand Master Sean.
Archers
After you have spoken to Scout Master Deikid, he will tell you to kill 10 slimes. After you have killed them, return to him and he’ll direct you to Grand Master Sean.
Clerics
After you have spoken to Paladin Master Keast, she will tell you to hand in one SP Potion (tier 1) to her. When that’s done, you’ll be told to find Grand Master Sean.
Fighters
After you have spoken to Warrior Master Marty, he will request you to deliver a letter to Skill Master Ruby in Roumen. When you have delivered the quest item to Ruby, she tells you that Marty has drinking problems and asks you to deliver her response back to Marty. After that, Marty tells you he can’t teach you anything so he tells you to go to and seek Grand Master Sean instead.
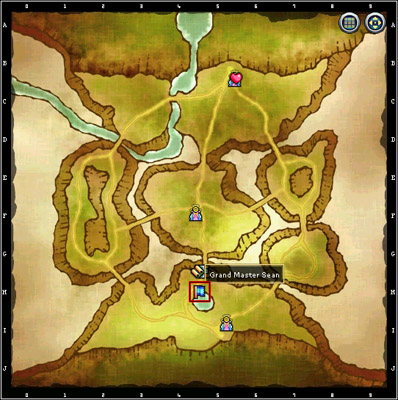
Grand Master Sean can be found in Forest of Mist:
Note to all classes: Before you go ahead to find him, make sure you have stocked up all your HP/SP stones and potions(unless your a cleric, then only SP stones/potions), and your scrolls. The hard part comes next and you will save some time if you fetch your things from your bank now rather than going back and forth.
The Hard Part
Grand Master Sean will tell you to fetch him the shadow key ![]() to get into the Dungeon of Shadow. You can kill any monster in the Forest of Mist to get the key (the key is an actual drop). I’ve got mine from a Ratman, but I’m certain that you can get it from any mob. When you give him the key, he will let you into the Dungeon of shadow.
to get into the Dungeon of Shadow. You can kill any monster in the Forest of Mist to get the key (the key is an actual drop). I’ve got mine from a Ratman, but I’m certain that you can get it from any mob. When you give him the key, he will let you into the Dungeon of shadow.
("From CanitoCool") - Once you speak to Grand Master Sean you can fetch the dungeon key by killing the monsters near him. I spoke to Grand Master Sean and once I finish to speak I killed the monsters around him and the key dropped easily.
Tisbad's Naked Method
Note: The safer method is to keep your equipment on, as your clone can hit rapid 100+ hits on you. If you're able to heal rapidly, read on. Use the below method at your own risk!
Before you enter the first time, strip yourself of everything. This is best done for Fighters, because with the kick-ass swords you guys get, they'll cut you to ribbons. When you enter, and your clone appears, he will have no weapons or armor. The only things you should leave on would be Necklaces, Rings, and maybe Earrings.
On the next time, when you search the blue light, walk directly under it, and you will lure no monsters. This is where I suggest stripping the second time, otherwise, they will have everything you have on. Once you hit the glowing red gem at the end, and are attacked by monsters, put everything back on, as fast as you can, and proceed to murder them.
THEY WILL USE ATTACKS YOU DO NOT HAVE, IF YOU LET THEM HOLD THE WEAPONS. However, without weapons, they will start punching you for about 100 damage. If you choose this tactic, make sure to put on your equipment as fast as possible. Hotkeying is recommended.
Another way is to put on your armour but not your weapon.
Non-Naked Method
Before you click "Yes, I am", start activating your scrolls. I’m telling you to do this now because when you get spawned in there, you would be too busy looking at your clone and wouldn’t have time to activate them since they have cool downs.
You will have 20 minutes to complete this part.
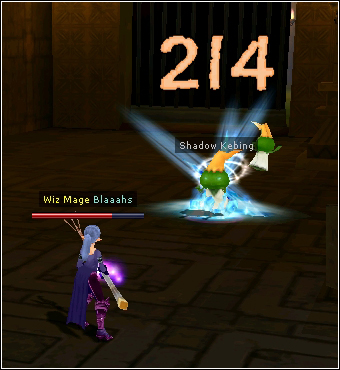
Your first battle with her wouldn’t last long. After you’ve taken about... I dunno... 200-400 hp maybe, she’ll say how boring you are and makes you follow her. You can’t follow her straight away because you get "locked" down for a few seconds. So on the way to following her, you will have to kill two shadow kebings. They’re not hard at all, so no stress.
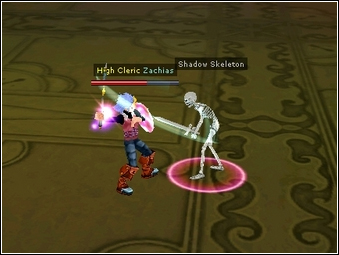
Next, you have to fight 6 skeletons (3 archers and 3 warriors) . Try and approach them one at a time, because if you get near one, they will start coming at you, and you don’t want 3 hitting you at the same time because that’s a waste of your HP pots. Some of them are ranged, and some of them are melee. These shouldn’t be much trouble either.
After that, you’ll need to kill another three Shadow Kebings.
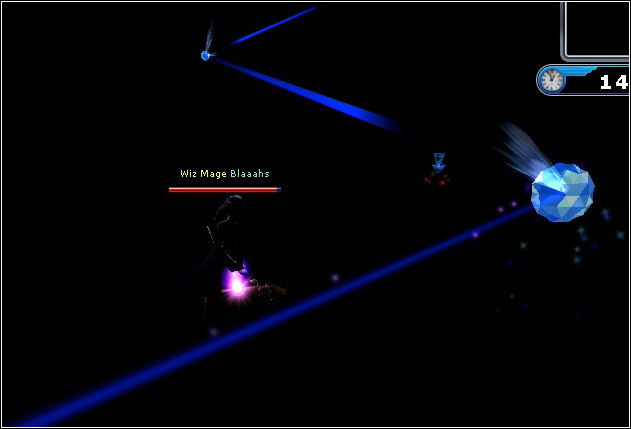
When you’ve finished them, your clone will tell you to follow the blue light. I love this bit. It’s so cool! The screen goes all dark and you don’t see anything except the light. How exciting =3
When you reach the end, everything will light up and you will find your clone plus two other people. One was a man (melee) and the other was a woman (ranged)NOTE: if you killed the man & the woman in the dark room,they will not come to attack you again. They will start to come and hit you, but at the same time, this stone monster also comes charging from behind! But no worries, the stone dude is easy to kill, so just turn around and kill that thing first. Remember to keep watching your SP and heal yourself! You can kill either next, but I killed the man first because he seemed to be doing more damage.
After you killed both of them, you start fighting your clone again. Every now and then, another stone monster comes out (you will notice that there’s a few standing around on the walls in the beginning anyway). I think three of them came out throughout the whole thing for me. Anyway, keep fighting and healing. I wouldn’t bother running if I were you. Clicking everywhere might mess you up and stones + potions were sufficient for me since they cancel each other’s cool downs out.
Extra Tips
Sparky’s Tip:
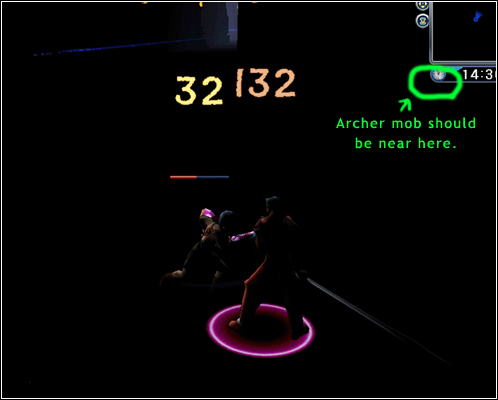
1. Right when you reach the dark room, the warrior and archer mobs are also in that room on the far right (maybe far left). Just go finish them off ONE vs ONE, there’s no need for you to take them all at once in the last room. I have included a screen below that shows approximately where the warrior and archer mobs are (notice the blue light on the top left, which is what you were following before). When you finish those two off, go to the last room.
2. When it lights up, go back to the right side of the wall right next to the crystal where the first golem will spawn, and eliminate it when it spawns! You can either wait for the other golems to spawn but I wouldn’t recommend it seeing how your clone will only stay still for a short while. While your killing the first golem, your clone will be out of your site range and will not be able to see you or attack you so you’re safe for a little bit! Not for long though, I assume.
3. After finishing the first golem though, finish your clone as soon as possible, at around 1k hp left on my clone, another golem came out.
---
Canitocool’s Tip:
Want to do this the easy way without trying to hardly find hp and magic potions? Try this out!:
1. Ask a kindly cleric to cast over you a "One hour Health / Magic Boost"
2. If you still have the chocolate bars of Valentine's Day you can use them to regens health and magic at the same time. Get at least 35 of them.
3. Start to kill monsters in the dungeon but keep an eye on your health.
Why the chocolate bars? I test them before entering the dungeon and proved that it regens all your health and magic at the same time, rather than the health potions and magic potions. With both potions, once you activate one, both potions gets deactivated due to the use. I am sure you don't want to risk your fight if you have health and magic low, to recharge one and wait seconds to then use the other potion. Chocolate bars recharge both health and magic at the same time with no downtimes to regen. Believe me..IT DOES WORK!!
Another thing is that if you have enough chocolates when you reach your clone at the end of the dungeon, do not worry for any of the golems nor any other enemy. If you concentrate your efforts in your clone, once he is dead, the other monsters disappears and VOILA!!! You had mastered your first trial of change.
Fmsa's Tip:
In order to do this, you will need to purchase your class's level 1 weapon (unless you still have it with you). Now put your current weapon in a hotkey slot and equip the level 1 weapon. When you enter the shadow realm, start attacking with the level 1 weapon and then switch. You'll continue attacking without any pause and save some time trying to get your weapon back on if you enter in empty-handed. Be sure to switch back to your level 1 weapon before facing your shadow again, and switch back when the enemies arrive.
---
Anyways, when you have finally killed your clone…
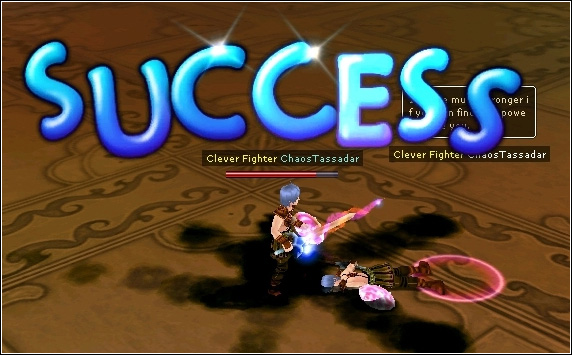
The prettiful SUCCESS sign pops up! You get spawned back to Grand Master Sean, and he will give you a choice between two(3 if you are fighter) level 20 weapons of your class. Choose carefully! Weapons are expensive, so it would be a shame if you end up regretting what you have chosen. You are also granted 5 Stat Points to allocate.
Once you’ve decided… complete the quest… and TA-DA!
You get an announcement about you.
Congratulations, you have now completed the job change quest!
Additional Notes / Updates
- Shadow Fighter: 7980 HP
- Shadow Archer: 5563 HP
- Shadow Cleric: 5260 HP
- Shadow Mage: 4468 HP
- Death in the Job Change quest will not result in the loss of experience.
Level 60 Job Change
This job change quest has 3 parts, good luck!
Over Time and Spaces 1
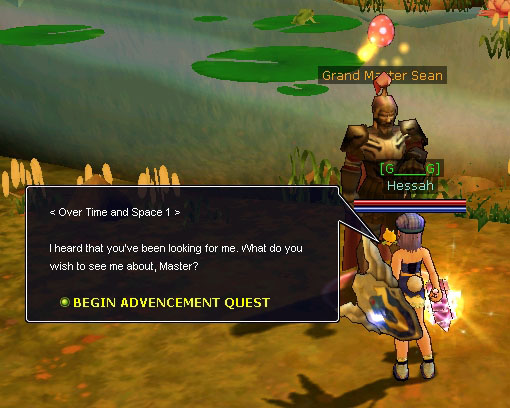
To Start the quest, talk to Grand Master Sean in Forest of Mist. He will ask you to deliver something to Town Chief Rumenus, this quest item will appear in your inventory.
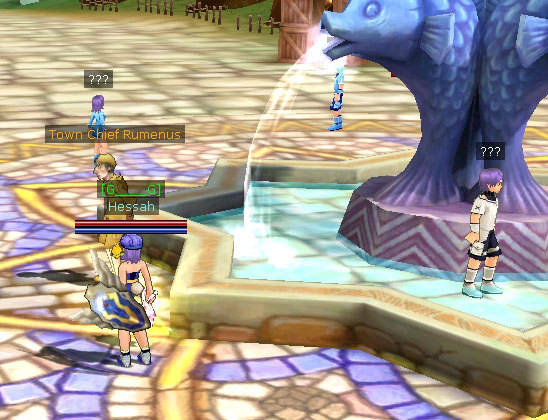
Grand Master Sean will then teleport you to a "fake" Roumen, where you'll see a few level 1 NPCs with "???" as names and Town Chief Rumenus by the fountain. Click on Town Chief Rumenus and all of them will turn into Zombies.
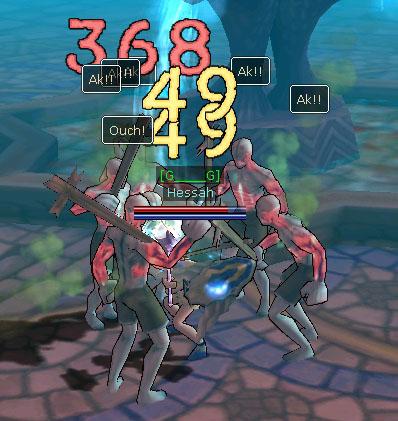
Zombies can cast poisons, but they don't hit too hard (from a cleric's point of view). Kill all the zombies, work your way up the town to where Grandpa Robin would be and you should find all the Zombies.
When you've killed all the Zombies, (it will count down for you from 10 zombies), you'll be teleported back next to Grand Master Sean in Forest of Mist. DO NOT talk to Sean again unless you want to kill Zombies again. Go to the real Roumen and to the Town Chief to cash in your quest.
Over Time and Spaces 2
Once you talk to the Town Chief Rumenus you will be teleported to a weird room comprised of cards and everything you associate with a casino. In the center there is a roulette. You simply pick a dice and spin the roulette by clicking the pole thing in the middle. If your lucky the marker will land on the dice that you selected. In which case a barrier to another room is opened.
If you aren't lucky and the light didn't land on your dice, then the dice will turn into some mobs, which you have to kill before trying again.
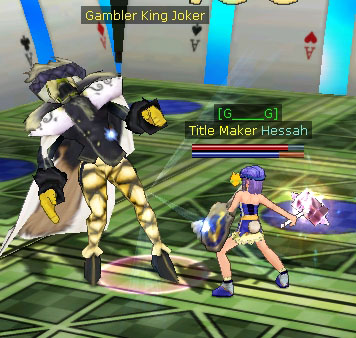
You simply kill the Gambler King Joker. He's relatively easy but he stuns. So don't be stingy and use your potions. Kill him and its over. You will be teleported back to Roumen with the Town Chief.
Over Time and Spaces 3
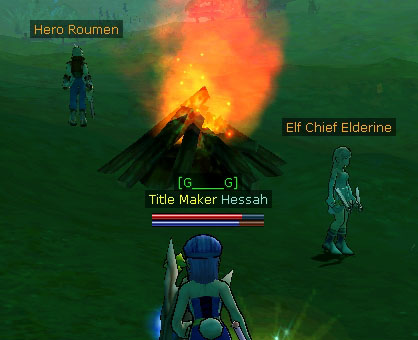
Talk to the Town Chief in Roumen again. This time something strange happens and you are ported back in time, into the Ancient Elven Woods. You will be given 5 minutes to find Elf Chief Elderine and Hero Roumen (which isn't hard at all, just follow the path and it turns towards the right). You will find Elderine and Roumen standing by the campfire.
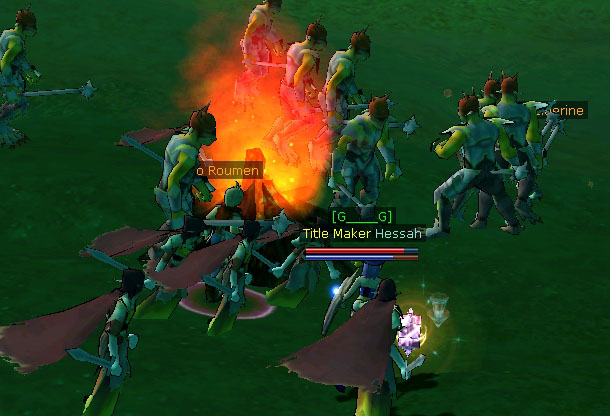
Then the next part lasts 20 minutes. Chaser Elves and Hunter Lizardmans will spawn. Your task is to keep Roumen and Elderine alive for 20 minutes. Monsters will spawn in waves, each wave with more monsters. Within the last minutes you will be flooded with tons of monsters coming from both directions.
The monsters themselves are pretty weak, but your goal is to keep the two alive. Fighters can mock and devastate to control aggro. The mob's deal very little damage so you can easily tank up to 30 or 40 monsters as an axe user. Archers can area poision and area shoot to keep aggro. Mages of course can AOE the heck out of the monsters. Clerics may have a more difficult time as you cannot cannot heal Roumen and Elderine.
In the last waves there are more monsters than any classes AOE can handle. In which case your main goal is to keep as many of the monsters off of Elderine and Roumen as possible.
Roumen and Elderine will heal over time in between waves, however if either of them dies before 20 minutes are up, you'll have to do part 3 all over again.
Finishing
When you're done, you'll be spawned back to Town Chief Rumenus and CONGRATULATIONS! You've completed your second job changes quest.
Job Change Quest Tips
Hessah's Tips for Clerics - Part 3
As we don't have Mock or AOE skills, and we can't heal Roumen and Elderine, Part 3 can get very hectic.
My observation is, spamming heal and rejuvenate DOES NOT draw aggros very effectively. (You can try, but it didn't work very well for me.) I found myself wasting time spamming heal that I don't need (as the mobs hit relatively softly, only does about 20-40 damage).
Firstly, when monsters spawns, they usually spawn in two groups from two sides of the map, try run up to one group and have them attack you 1st. The other group will go and attack the NPCs at the same time, so you go and work the other group off the NPCs.
I draw aggro by hitting the monsters that are hitting the NPCs twice, and that was sufficient for me to get the aggro back. (But I used a +9 hammer, you might have to hit it once more if your weapon isn't enhanced). There's less chance of Roumen and Elderine dying if you prioritize taking aggro off the NPCs rather than trying to kill the monsters.
At many points in this part, monsters and NPC are often overlapping and cluttered together, you can't see which monster is hitting who (you, Elderine or Roumen), making it hard to see which monsters you have to hit to get the aggro off the NPCs. My advice is to move away from the entire group of mess, this will walk the monsters that you've already got aggro out of the group, and make it clear which monsters are left, that you have to get off the NPCS.
Good luck!
Finray's tip for clerics: I suggest you run into Lizardmen first, for they have less hp and do more damage. Kill some of them and then bash and trip/bleed like hell on the mobs attacking the NPCs.
Ukly's tips for Clerics
As most of you know I don't even play a cleric, still did it as a cleric though, a friend couldn't beat it. This is my strategy. Think of Roumen and Elderine as a mob...they have aggro just like mobs do, and they have an aggro range. Why is this important? Because they follow mobs, and the mobs aggro the nearest player, whether it be you, Roumen or Elderine.
At the beginning, get aggro, there are not many mobs, then lead the last few mobs over to the very side. The idea is that Roumen and Elderine follow you. When the next wave spawns, be the first to go and pull them and they will START with aggro on you, then you don't have to keep changing targets to keep the aggro off of Roumen and Elderine. You are essentially moving them to a safe zone, then pulling like you would for an aoe.
The problem is this...the aggro of Roumen and Elderine grows. If you just try and leave them on the side and ignore the mobs, both of the characters will run headfirst into the mob. You MUST go collect the mob before they do, or it is really difficult to complete. I hope this helps ^^.
Someone's summary?
THIS QUEST IS HARD! Stock up on stones before the quest. There are very few breaks to do this. I don't exactly remember what is in it but I know that you will have to have luck for a gambler part, then kill the gambler when you win. You then get transported to roumen where waves of some kind of zombie raid the empty town 3 times, and you have to kill all of them. You then get teleported to a field (in the past of Isya) Where Roumen(a fighter NPC) and Eldrine (an archer NPC) ae defending a new settlement in Isya. YOU CAN'T LET EITHER ROUMEN OR ELDRINE DIE(Note: Clerics You can't heal either of them so don't think you have your work cut out for you) BY KILLING ALL THE CREATURES! After that you will return to Grand Master Sean and he will tell you that you succeded where he failed(or something like that) and that you earned a great reward. Finally Return to your respective skill NPC in Eldrine(the town). LVL 60 Job Change Quest COMPLETED! :-)
Personal observation from falken(teva)6x warrior: roumenus can handle any mob thrown at him. Smart idea for any class is to keeep the mob off of the archer. After that mob is done then get the mob off the fighter. This worked for me but im a fighter. Your probly thinkin that it worked for me because of that but I have a cleric friend who did the same thing so it works.
